Wednesday, 30 July 2014

Vegan, Gluten and Refined Sugar Free Muesli Slice - Honey and Peanut


This is my own creation. I am over buying muesli bars that are high in sugar and very rarely gluten free, when they easily can be. Over the past few weeks, i have made several batches and finally come up with a gluten free, dairy free and vegan slice!! It can also be refined sugar free if you choose not to add it in, I don't usually add sugar and is sweet enough without it. I have based this around an unbaked peanut butter slice and made changes to how i like my muesli bars. I use the peanut butter that is 100% nuts (If you are in NZ the Pics Peanut Butter works well). It has honey and coconut sugar (optional) to slightly sweeten and heaps of raw goodness such as wheat free oats, coconut, seeds, nuts and more. As long as you use the same measurements, you can substitute the nuts and seeds for what you please. This is a very easy recipe that doesn't require many steps or techniques so can be made by anyone. ENJOY

Charlottes peanut muesli slice:
1 cup rolled oats (use gluten free oats if making gluten free slice)
1 cup threaded coconut
½ cup rice flakes
½ cup sliced almonds
¼ cup sunflower seeds
¼ cup pumpkin seeds
1/3 cup chopped mixed nuts (i used hazel nuts as i had some spare)

2/3 cup peanut butter (I use Pics peanut butter that contains only peanuts)
3 T honey (use brown rice malt syrup or agave if making slice vegan)
4 T Coconut oil (use 3T butter if making non-dairy free)
1 T coconut sugar (can also use brown sugar), this is optional. I don't usually add sugar and is sweet enough without it.

Add all dry ingredients into a mixing bowl and stir to combine.
Add a peanut butter, honey, coconut oil (or butter) into a saucepan over a low heat until melted. Add sugar and stir till dissolved. Take off the heat.

Stir into the dry ingredient till all is combined (If your slice seems too dry add 1-2T of melted coconut oil). Press into a slice tin. Place in the fridge till it is set. Should take around 2 hours or if you are in a hurry 1/2 hour in the freezer.
Cut into squares/bars and enjoy!


Monday, 21 July 2014

Gluten and Dairy Free Pumpkin Pie with a Coconut Macaroon Crust!

Pumpkin pie is something that has always intrigued me. Here in New Zealand pie is usually always savoury, where as this is not the case in many other countries. We do have apple pie but aside from that no other sweets. Pumpkin pie Is a traditional American Thanksgiving dessert. This is my twist on a sweet pumpkin pie made with a coconut macaroon crust. This is gluten and dairy free. ENJOY
Macaroon crust ingredients:
3 cups shredded unsweetened coconut (may need more depending on the constancy of the egg white.
1/2 cup sugar
1 1/2 tbsp corn flour
1/4 tsp salt
4 egg whites, plus one additional egg white, separated (reserve 4 yolks for filling)
1 tsp vanilla
Pareve pumpkin filling:
2 cups pumpkin puree (Made from half a pumpkin)
1 cup full fat coconut milk
2 eggs, plus 4 reserved yolks from crust
1/2 cup sugar
1/2 cup brown sugar
1 1/2 tsp vanilla
1 1/2 tsp cinnamon
1/4 tsp ground ginger
1/4 tsp nutmeg
1/4 tsp salt
Pinch ground cloves

To make coconut macaroon crust:
Preheat oven to 160 degrees Celsius. In a mixing bowl, stir together coconut, corn flour, sugar and salt until thoroughly combined.
In a separate bowl, whisk together 4 egg whites and vanilla until frothy.
Pour egg mixture into coconut mixture and allow to sit for 20-30 minutes.
Generously grease a 9 inch pie dish (I used an 8inch cake tin) with non-stick cooking spray and evenly press in the macaroon crust mixture.
Cover edge of the crust with aluminum foil and bake for 45 minutes.
Meanwhile, whisk remaining egg white with ½ tbsp of water.
When crust has finished baking, remove from oven. Brush crust with egg white to create a seal. After brushing on the egg white, put the protective foil back around the edge of the crust.
Bake for an additional 10 – 15 minutes till the crust is golden brown.

To make filling
Cut the pumpkin into even pieces, removing the inside seeds etc and bake for an hour at 180 degrees with a dash of olive oil. Leave to cook and scoop pumpkin from the skin and into a blender to make the puree. I used half a pumpkin, which made 2 cups of puree, may vary depending on the size.
Increase oven temperature to 200 degrees.
Place all of your filling ingredients into a blender and blend until creamy and smooth, about 60 seconds. I’ve found this is the best way to create a smooth, evenly mixed filling. Alternatively, you can pour the ingredients into a large mixing bowl and blend with an immersion blender or a whisk, just make sure all ingredients are very well incorporated.
Pour the mixture into a saucepan and heat over medium for 9-10 minutes, until just starting to thicken and bubble around the edges.
Remove foil from the edges of your macaroon pie crust. Pour the mixture into your prepared macaroon crust and smooth the top with a spatula. This recipes is written for a deep 9 inch pie dish, but you can use it to fill two smaller shallow pie dishes if you prefer. Fill to the top of the crust.
Tent the pie with foil, making sure to leave plenty of space between the surface of the pie and the foil, otherwise you will ruin the top of your pie filling.
Carefully place the pie onto the centre rack of your oven. Bake for 15 minutes, then remove foil tent and reduce heat to 170 degrees. Bake for an additional 35 minutes, or until the filling sets and only jiggles slightly. If the edge of the crust is getting too brown for your liking, you can carefully cover the edge of the crust with foil-- just be sure not to touch or mess up the top of the custard.
Turn off the oven and crack the oven door. (i use a wooden spoon to prevent the oven door from closing all the way). Allow the pie to cool slowly in the oven for 1 hour – this will help prevent the top from cracking.

Remove pie from the oven and allow to cool completely to room temperature (about 3 hours) or chill in the refrigerator before cutting and serving. Keep leftovers refrigerated.

Saturday, 5 July 2014

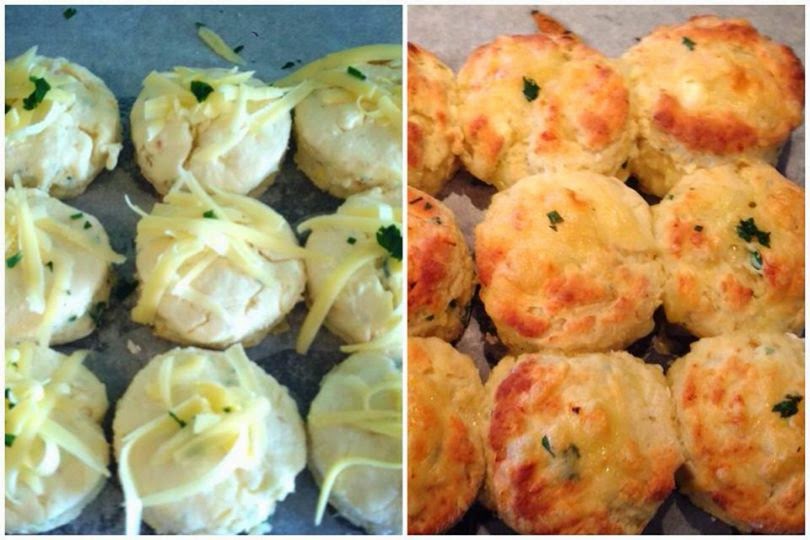
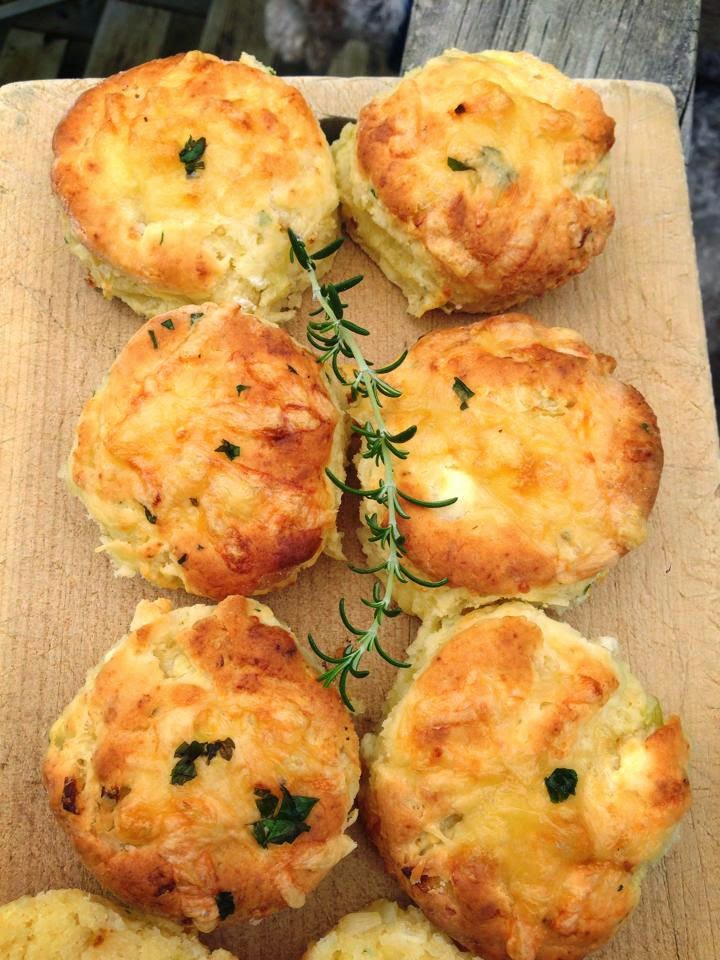
Gluten Free Scones - Savoury Cheese and Onion

Decided to go a little out of my comfort zone today and make something savoury!!! If you have seen my blog before you will know this is a first. I have never made scones before so am very happy with my first attempt. Before now i never had really ever heard about gluten free scones, never seen them in a cafe or even a baking mix for scones. So it was my turn to adapt recipes and create such a thing. You honestly cannot even tell they are made with gluten free flour. Do recommend using tasty cheese as it gives a stronger flavour. The ground almonds are also essential to give the fluffy texture. Recipe adapted from Jamie Olivers Fluffy gluten free scone. ENJOY
Makes 9 
1¼ cup gluten-free plain flour  
2 teaspoons baking powder 
¼ cup almond meal 
A good pinch of sea salt 
3/4 cup gratted cheese, plus a little extra for to of scones (Use tasty cheese if you can, gives more flavour)
1 small onion (finely cut and cook with a knob of butter over a low-medium heat for 4 minutes or until cooked)
25g crumbled feta cheese
80ml cream 
125ml milk, plus a little extra for brushing scones
Optional - small amount of parsley (about 2 tablespoons)

Preheat oven to 220°C and line a baking tray with baking paper. Put the flours, baking powder, almond meal and salt into a bowl, make a well in the centre. 

Add in the cheeses and parsley. Combine the cream and milk then pourin to the well and mix just until the dough comes together. 
Pat the dough out on a lightly floured surface and use a lightly floured round cutter to cut rounds out of the dough. 
Place the rounds touching each other into the lined baking tray, lightly the brush the tops with milk and bake for 10-15 minutes, or until risen and golden. Leave to cool for a few minutes. Scones are best eaten warm with a knob of butter in the middle.